How to Assemble a Trampoline with Ease: A Step-by-Step Guide
Trampolines are a great way to keep kids and adults active and entertained. You must first put your trampoline together before you can start jumping.

Assembling a trampoline may seem daunting at first, but with the right tools and guidance, it can be a straightforward process.
I am Mr. Reko, an enthusiast in the gaming zone and an experienced game coach who guides people about how to assemble a trampoline step-by-step.
I will also provide you with tips and troubleshooting advice to ensure that your trampoline is safe and ready to use. So let’s get started!
Importance of Proper Trampoline Assembly
Proper trampoline assembly is essential for ensuring the safety of the user. A poorly assembled trampoline can be dangerous and cause injuries to the user.
According to the Consumer Product Safety Commission (CPSC), trampolines are responsible for thousands of injuries every year.
By following the manufacturer’s instructions and assembling your trampoline correctly, you can help reduce the risk of injury.
Additionally, the proper assembly can also help prolong the life of your trampoline, ensuring that you get the most out of your investment.
Preparing for Assembly
Before you start assembling your trampoline, it’s important to prepare your space and gather the necessary tools and materials. Read some suggestions to get you started:
Clear the assembly space
Make sure you have a clear and level space to assemble your trampoline.
Remove any obstacles, debris, or objects that could cause injury or hinder the assembly process.
Gather the necessary tools and materials
Check the manufacturer’s instructions to see what tools and materials are needed for the assembly.
Some common tools you may need include a rubber mallet, pliers, screwdrivers, and wrenches.
Wear appropriate clothing and safety gear
Wear comfortable, non-slip shoes and clothing that allows for easy movement. In addition, it is essential to use gloves and safety glasses to safeguard your hands and eyes.
Consider safety considerations
Have a safety plan in place before assembly, including having a second person present to help with the heavier parts.
Reading the Instructions
Before starting the assembly process, it’s important to read and understand the manufacturer’s instructions. Here are some things to keep in mind:
- Start from the beginning and work your way through each phase. Don’t skip ahead or try to assemble parts out of order.
- Many trampolines use common instructions and symbols to indicate certain parts or actions. Make sure you understand these symbols and instructions before beginning assembly.
- Look for troubleshooting tips in the instructions. If you encounter any issues during assembly, these tips can help you resolve the issue quickly and easily.
- Don’t rush through the instructions. Before continuing, take your time and be certain that you understand each step.
Assembling the Frame
The first step in assembling your trampoline is to assemble the frame. Here are the basic steps to follow:
Lay out the parts
Lay out all the parts and pieces of the frame according to the manufacturer’s instructions.
Connect the frame pieces
Connect the frame pieces according to the manufacturer’s instructions.
This may involve sliding pieces together, using bolts and nuts, or other methods. Ensure that each connection is tight and secure.
Add the legs
Once the frame is connected, add the legs to the frame. Make sure that each leg is securely attached and tightened.
Attach the springs
After the legs are attached, attach the springs to the frame. Depending on the size of your trampoline, you may have dozens or even hundreds of springs to attach. Make sure that each spring is securely attached and tightened.
Check for stability: Once the frame and springs are attached, check to make sure that the frame is stable and level. Adjust the legs if necessary to ensure stability.
Common mistakes to avoid
When assembling a trampoline, it’s important to take the time to do it to ensure safety and proper functionality. Avoid these common missteps:
Skipping the instructions
Don’t assume you know how to assemble the trampoline without reading the instructions.
Skipping steps or not following instructions can lead to mistakes and unsafe conditions.
Not having the proper tools
Make sure you have all the necessary tools before starting the assembly process.
Not having the right tools can make the process more difficult and cause damage to the trampoline.
Not checking for level ground
Ensure that the trampoline is set up on a level surface to prevent instability and injury.
Forgetting to attach safety features
It’s crucial to attach safety features such as padding and safety enclosures to the trampoline to prevent injuries.
Overstretching springs
Overstretching springs during assembly can cause them to lose tension and lead to a less bouncy and unsafe trampoline.
Installing the Springs and Mat

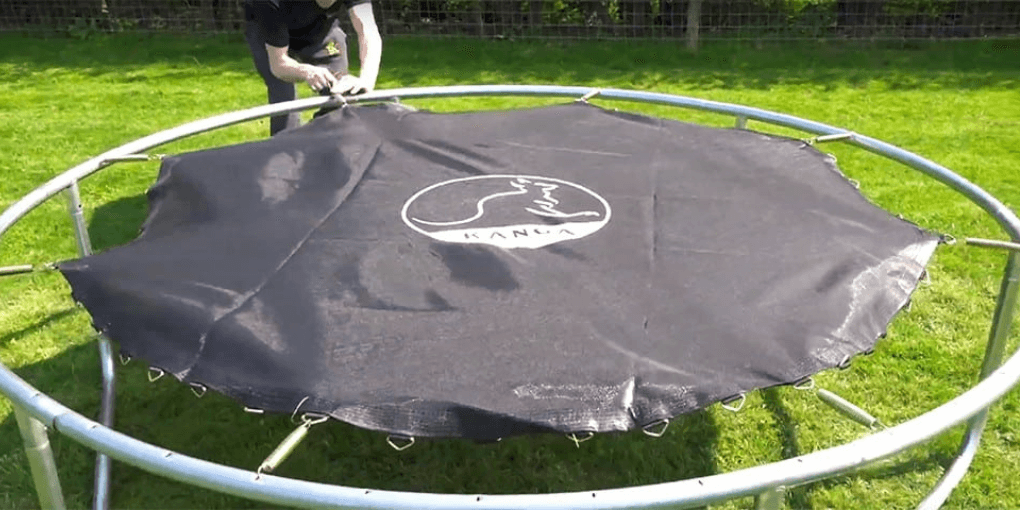
Once the frame is assembled, the next step is to install the springs and mat. Here are the basic steps to follow:
- Set the mat down in the exact middle of the frame. Make sure that it is evenly centered and that the springs can be easily attached.
- Starting at one end of the trampoline, attach the springs to the frame. Use a spring tool to pull the spring onto the frame hook, then attach the other end of the spring to the mat.
- Work your way around the trampoline, attaching each spring to the frame and mat. Make sure that the tension on the mat is even and that the springs are evenly spaced.
- Once all the springs are attached, double-check each connection to make sure that the springs are attached and the mat is tight.
Attaching the Safety Enclosure
The safety enclosure is an important safety feature for any trampoline. Here are the basic steps for attaching the safety enclosure:
Lay out the enclosure
Lay out the safety enclosure net and poles according to the manufacturer’s instructions.
Attach the poles
Attach the poles to the frame of the trampoline. Make sure that each pole is securely attached and tightened.
Install the net
Install the safety net on the poles. Make sure that the net is pulled tightly and that there are no gaps or holes in the net.
Secure the net
Once the net is installed, secure it to the frame of the trampoline using the clips or ties provided by the manufacturer. Make sure that the net is securely attached and that there are no gaps or holes in the net.
Double-check the enclosure
Double-check the safety enclosure to make sure that it is securely attached and that there are no gaps or holes in the net. Test the enclosure by giving it a gentle shake to make sure that it is stable.
Final Touches and Safety Checks
After assembling the trampoline and attaching the safety enclosure, there are a few final touches and safety checks to perform. Some of the basic steps to follow are:
Install padding
Install padding over any exposed metal parts of the trampoline, such as the springs and frame.
This will help prevent injuries if someone accidentally falls on the metal parts.
Check the connections
Double-check all the connections and make sure that everything is tightly secured. Check the bolts, nuts, and screws to make sure that they are properly tightened.
Look-forward the tension
You need to check the tension of the mat and the springs to make sure that they are evenly tensioned. Adjust the tension if necessary to make sure that the mat is level and stable.
Check the area around the trampoline
Check the area around the trampoline to make sure that there are no hazards. Sharp objects or low-hanging branches, could injure someone using the trampoline.
Establish safety rules
Establish safety rules for using the trampoline, such as limiting the number of people who can use it at one time and not allowing flips or somersaults.
Troubleshooting Tips
Even with careful assembly, issues may arise with the trampoline. Fixed common troubleshooting tips to address these issues:
- When the mat is sagging in the middle, check the tension of the springs and adjust as necessary to make sure they are tensioned.
- If the springs are popping out of place, check to make sure they are securely attached and tightened.
- If the enclosure net is sagging, make sure it is securely attached to the poles and frame, and adjust the tension if necessary.
- discovering the missing parts during assembly, contact the manufacturer or retailer to request replacement parts.
- If the trampoline is wobbly due to uneven ground, try moving it to a more level location or using shims to level it.
Safety Considerations
Assembling a trampoline is an important step in ensuring safety when using it.
Adult supervision
Children should always be supervised when using the trampoline. Children should never utilize the trampoline unattended.
Weight limit
Make sure to follow the manufacturer’s recommended weight limit for the trampoline.
Single-user limit
Many trampolines are designed for single-user only. Make sure to follow this recommendation to prevent injuries.
Use safety equipment
Always use safety equipment, such as safety nets, padding, and helmets, when using the trampoline.
Proper use
Do not allow flips, somersaults, or other risky maneuvers on the trampoline.
Regular maintenance
Regularly inspect the trampoline for wear and tear and perform any necessary repairs or replacements.
Maintenance Tips
Proper maintenance is essential for keeping your trampoline in good condition and preventing accidents. Some maintenance tips to keep in mind:
- Clean the trampoline frame, springs, mat, and safety enclosure regularly to prevent dirt and debris from accumulating.
- If your trampoline is made of metal, use a rust-preventative spray to protect the frame and springs from rust.
- Cover the trampoline when not in use to protect it from rain, snow, and sun damage.
- Inspect the trampoline regularly for wear and tear, such as torn mats, missing springs, or loose bolts. It is important to quickly fix or replace any broken components.
- Apply a silicone lubricant to the springs and other metal parts of the trampoline to reduce friction and prevent rust.
Conclusion
You might be intimidated by the prospect of putting together a trampoline. But by following the manufacturer’s instructions and taking the time to do it right, you can ensure that your trampoline is safe and ready for use.
Remember to prioritize safety at all times, both during assembly and when using the trampoline.
Regular maintenance and inspections will also help ensure that your trampoline remains in good condition and can be enjoyed for years to come.
With these tips and considerations in mind, you can assemble your trampoline with confidence and enjoy hours of safe and fun bouncing.
FAQs
The assembly time can vary depending on factors such as experience, trampoline size, and model complexity. On average, it may take anywhere from 2 to 4 hours.
Basic tools such as a socket wrench, pliers, and a rubber mallet are typically required. Refer to your trampoline's instruction manual for a comprehensive list of tools specific to your model.
Contact the manufacturer immediately. They will provide guidance on obtaining replacement parts. In the meantime, avoid assembly and follow any temporary solutions recommended in the manual.
Regular inspections should be conducted every few months. Look for loose bolts, damaged springs, or sagging in the mat. Perform maintenance tasks, such as tightening bolts and lubricating moving parts, to ensure longevity.
Yes, trampolines can be disassembled and moved. Follow the disassembly instructions in the manual and take care when reassembling in the new location. Secure any loose parts during transport.


